Pilates Muscle Activation: EMG Data by Equipment Type
By Mateo Álvarez • 24th Apr
Pilates muscle activation varies significantly depending on whether you train on a reformer or mat, and electromyography (EMG) data reveals measurable differences in how your core muscles engage across these two primary modalities.[1] Understanding these biomechanics is essential for anyone designing a home or micro-studio practice, it helps you choose equipment that genuinely matches your goals and space constraints, rather than defaulting to whatever fits through the door.
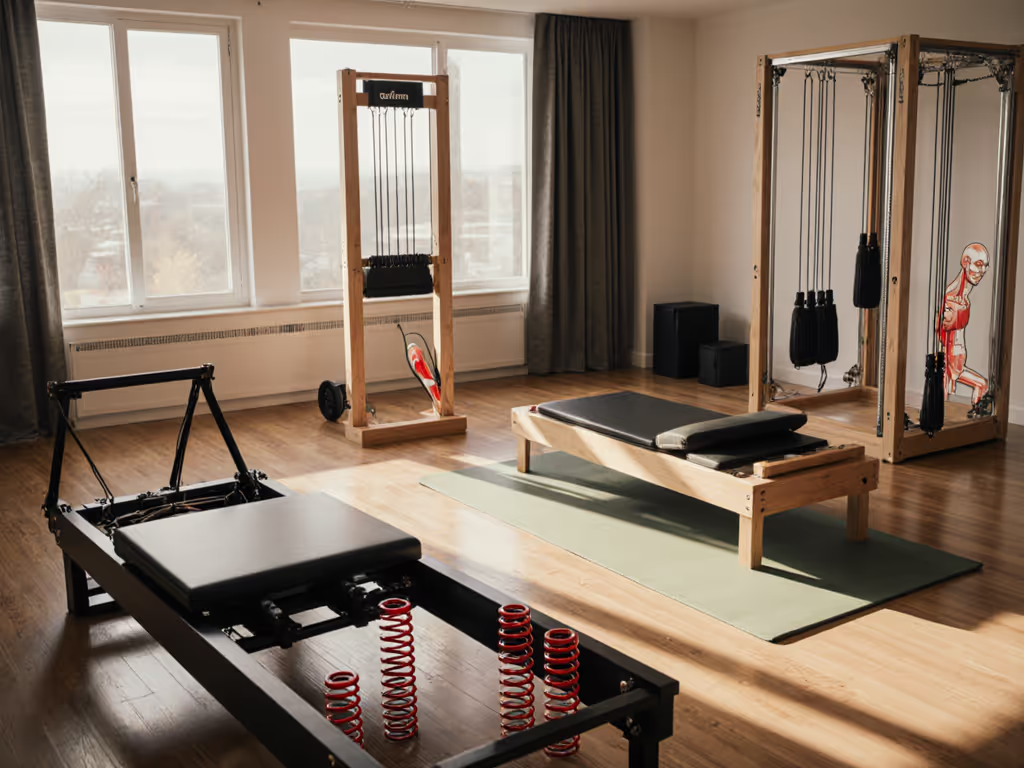
When I first taped out floor plans for three reformers in a compact studio, I discovered that understanding where muscles fire is as important as knowing whether they fire. For a step-by-step layout plan that preserves walking lanes and reduces transition bottlenecks, see our silent small-space studio setup. One reformer layout left safe walking lanes intact; the other two cramped the space and forced awkward transitions that compromised movement quality. That experience taught me that muscle activation decisions and spatial planning are inseparable. Every hinge, carriage stroke, and reset time directly shapes both your physiology and your environment.
Step 1: What EMG Data Actually Measures
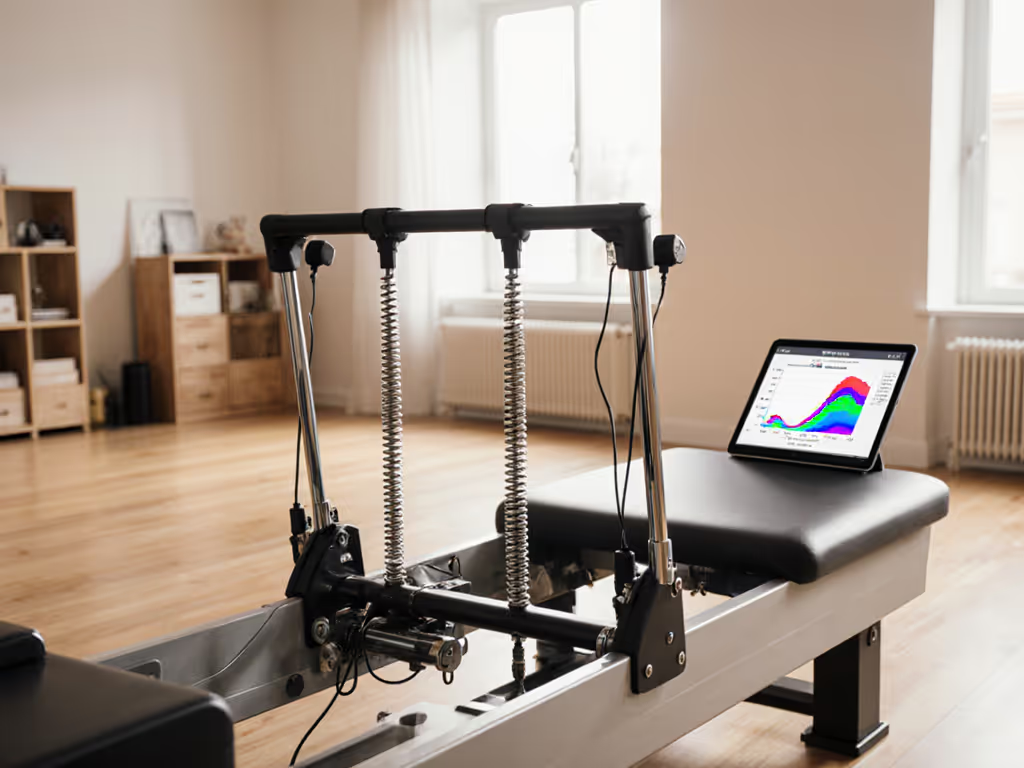
Electromyography captures electrical activity in muscles during movement, quantifying how hard and how consistently a muscle works. Unlike subjective "feel," EMG provides objective, comparable data across individuals and equipment types. Research published in the Journal of Bodywork and Movement Therapies has examined EMG profiles during Pilates exercises across multiple muscle groups, and the findings consistently show that reformer training recruits deeper stabilizers, including the transversus abdominis and multifidus, more effectively than traditional mat work alone.[1]
The key insight: core activation is not monolithic. Surface muscles (rectus abdominis, external obliques) activate differently than deep stabilizers. A single crunch primarily targets the rectus abdominis, whereas a reformer footwork series simultaneously recruits your transversus abdominis, multifidus, and external obliques, creating more functional, full-body core engagement.[1]
Why this matters for small spaces: if your practice is compact and requires smart equipment choices, knowing which muscles you're targeting helps you avoid redundant purchases and maximize your return on floor footage.
Step 2: Reformer Activation Patterns - The Spring Resistance Factor
How the Carriage Changes the Equation
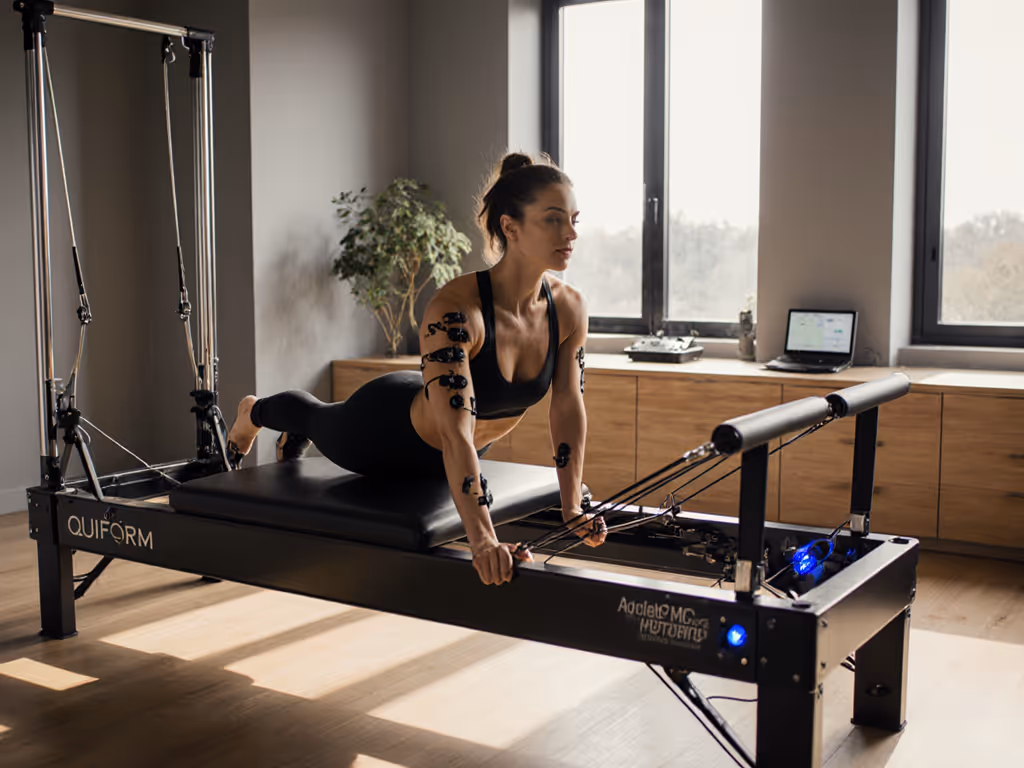
The reformer's moving carriage introduces a reactive, unstable element that demands continuous neuromuscular engagement. A comparative EMG study found that exercises like the reformer plank and footwork series recruited the transversus abdominis at significantly higher levels than their mat-based equivalents.[1] This reactive demand (the need to stabilize and control an independently moving platform) is central to why reformer training outperforms mat-only approaches.
One critical nuance: spring resistance settings significantly affect which muscles are recruited and to what degree.[1] For the physics behind springs versus bands and how tension curves shape activation, read our spring mechanics explainer. Lower resistance increases stabilizer demand (your deep core works harder to control less external support), while higher resistance shifts more of the load to primary movers. This means the reformer is not a one-setting tool; intelligent programming accounts for this relationship. For small-space practitioners, this is valuable: you can adjust spring tension to modify muscle recruitment without changing exercises or footprints.
Core Activation Hierarchy on Reformer
Research confirms the following recruitment order during reformer work:
- Transversus abdominis (deep stabilizer): Most effectively recruited during controlled carriage movements and transitions
- Multifidus (deep spinal stabilizer): Highest activation during exercises involving changes in pelvic position (posterior tilt to neutral, neutral to forward tilt) and trunk inclination relative to the ground[6]
- External obliques: Greater activation in experienced practitioners, particularly during exercises demanding rotational control or unilateral stability
- Rectus abdominis: Engaged, but not dominant in well-executed reformer training; isolated if form collapses into flexion-dominant patterns
The distinction matters: traditional crunches can create muscular imbalances and place compressive stress on the lumbar spine without adequately training the deep stabilizing layer.[1] Reformer work distributes load across a broader, deeper musculature.
Step 3: Mat Pilates vs. Reformer - Direct EMG Comparison
The research is unambiguous: reformer-based Pilates produces greater activation of deep stabilizing muscles than mat work alone, largely because the moving carriage introduces that reactive element.[1] For a deeper, apparatus-by-apparatus EMG breakdown, explore our equipment muscle activation comparison. However, mat Pilates still delivers meaningful core benefits, and many practitioners use both modalities together for a comprehensive training stimulus.[1]
Comparative Activation Summary
| Muscle Group | Reformer | Mat | Key Difference |
|---|---|---|---|
| Transversus abdominis | High (reactive demand) | Moderate | Carriage instability increases deep core demand |
| Multifidus | High (pelvic transitions) | Moderate | Controlled vector changes on reformer optimize recruitment |
| External obliques | High (in experienced users) | Moderate-High | Reformer demands more precise co-contraction patterns |
| Rectus abdominis | Moderate | Moderate-High | Mat-only work risks overemphasis on superficial flexors |
| Global stabilizers (IO, EO interplay) | Coordinated/efficient | Variable | Reformer teaches integrated activation patterns |
Both Pilates and resistance exercise are effective for increasing abdominal deep muscle thickness.[2] The transversus abdominis was most effectively recruited in Pilates groups, while the internal oblique was recruited in a similar manner in resistance and Pilates exercise groups.[2] What this tells you: if your goal is deep spinal stability and postural control, reformer Pilates has a measurable edge. If your goal is surface strength or hypertrophy, supplemental mat work or resistance training may offer distinct value.
Step 4: Proficiency Level & Muscle Recruitment Patterns
Another layer of complexity: experienced Pilates practitioners activate muscles differently than novices. A recent study examining core muscle activity in practitioners of varying proficiency found that experienced practitioners scored significantly higher in functional movement ability and demonstrated greater core muscle activation, particularly in the external oblique muscle group, compared to novice practitioners.[4]
Key Proficiency Distinctions
Experienced practitioners:
- Demonstrate higher external oblique (EO) activation across all movements
- Show superior agonist and synergist muscle coordination, likely due to improved breathing techniques and proprioceptive awareness[4]
- Exhibit shorter EMG activation duration (muscles work more efficiently, not longer)
- Display higher RA/EO co-contraction index during dynamic transitions like the double leg stretch
Novice practitioners:
- Demonstrate longer muscle activity duration and prolonged EMG activation time during exercises like spine stretch, jackknife, and roll up[4]
- Show less coordinated co-contraction patterns; individual muscles work harder but less synergistically
- Rely more heavily on superficial muscles to compensate for weak deep stabilizer engagement
Practical takeaway: if you're new to Pilates, expect your reset time (the duration muscles need to recover between sets or modalities) to differ from an experienced practitioner. This affects how you structure sessions in micro-studios or small home setups. Programming longer transitions between reformer work and mat sequencing allows novice practitioners to integrate movement patterns without fatigue spillover.
Step 5: Translating EMG Data to Equipment Choice for Small Spaces
Tape the Footprint, Then Test the Flow Under Pressure
Understanding muscle activation research is one thing; applying it to a 200-square-foot studio corner is another. Here's a checklist-based approach:
Step 5a: Define Your Primary Goal
- Deep core stabilization & postural control → Reformer-dominant programming
- Hybrid strength + stability → Reformer + selective mat work
- Flexibility + functional breathing → Mat-based with reformer accents
- Joint-protective conditioning → Reformer with lower spring resistance
Step 5b: Map Your Spatial Allocation
- Reformer footprint (typical): 27"W × 85-95"L × 30"H; requires 3-4 feet of clearance on all sides for safe carriage transitions
- Mat space: 24"W × 68"L minimum; 4-5 feet width for extended movements
- Transition lane: 2 feet minimum between equipment to avoid rushed repositioning
- Wall buffer: 6 inches behind equipment to accommodate spring attachments and prevent contact with studs or finishes
Document your room using a floor plan sketch or phone photos with a measuring tape in frame. This prevents equipment selection based on showroom impressions rather than actual spatial constraints.
Step 5c: Select Equipment That Supports Your Activation Profile
If reformer-driven muscle activation is your priority:
- Verify carriage glide smoothness (fewer vibrations = less neighbor disturbance, better proprioceptive feedback)
- Test spring resistance range; lower-resistance settings increase stabilizer demand for advanced practitioners, while medium-to-higher resistance supports novices
- Confirm that frame footprint permits safe walking lanes around the equipment
If hybrid (reformer + mat) is your model:
- Prioritize a folding or compact reformer that stores or nests efficiently
- Pair with a sealed, cushioned mat designed for apartment acoustics (low-bounce impact)
- Allocate reset time: allow 60-90 seconds between reformer work and mat transitions to refresh neuromotor focus
Step 5d: Validate Activation Under Real Conditions
Once equipment is installed, perform a functional test:
- Execute 5 reformer footwork reps at standard spring tension
- Transition to mat work (e.g., single leg stretch)
- Assess: Did your deep core feel engaged? Did you need time to re-stabilize on the mat, or was recruitment seamless?
- Adjust spring tension or sequencing if transitions felt jarring or if surface muscles dominated
This real-world validation reveals whether your equipment choice genuinely supports the muscle activation profile the research predicts. It also helps you fine-tune resistance and sequencing for your space.
Step 6: Further Exploration - Refining Your Practice
You've now got the EMG foundation. Here's where to deepen your understanding:
Test Individual Exercises
If you have access to a teacher or training resource, isolate specific exercises and notice which muscles feel active:
- Reformer footwork: Should feel in deep core and glutes, not primarily in hip flexors
- Long stretch series: Should demand transversus abdominis engagement; if your lower back arches excessively, reduce spring resistance
- Reformer plank: Compare how it feels versus a mat plank; note the carriage reactivity difference
These subjective observations layer onto the EMG data, personalizing your practice.
Explore Accessory Layers
Research your equipment's compatibility with secondary tools: For vetted add-ons that expand your repertoire without adding noise, see our quiet reformer accessories guide.
- Spine corrector or box: Modifies pelvic tilt range, changing multifidus recruitment patterns
- Long box: Extends exercise repertoire without adding footprint; shifts load angles and stabilizer demand
- Straps: Reduce limb weight, allowing you to isolate deep core rather than fighting primary mover fatigue
Each addition should serve a measurable activation goal, not just variety.
Log Your Patterns
Track which exercises create the deepest sense of core stability and postural ease. Over weeks, you'll identify your optimal activation profile, the precise combination of equipment, resistance, and sequencing that produces both EMG-level neuromotor sophistication and sustainable, quiet practice in your confined space.
By grounding your equipment and programming choices in EMG evidence rather than trend or assumption, you build a practice that works for your body and your space, not against either one.
Related Articles