Best Pilates Equipment for Stage Presence
By Mateo Álvarez • 15th Mar
Best Pilates equipment serves a dual purpose that most practitioners overlook: it builds not just physical strength, but the embodied confidence and postural command that separates effective presenters from forgettable ones. When you train on reformers, chairs, and barrels designed for precision and alignment, you develop the muscle memory, core stability, and kinetic awareness that translates directly to stage presence (the ability to hold your frame, breathe steadily, and move with intentionality under pressure).
For professionals who speak, teach, pitch, or lead (whether in boardrooms, on stage, or in client meetings), Pilates equipment becomes a performance tool. This guide breaks down the best setups, spatial logic, and workflow steps to transform your practice from fitness routine into presence training. If your voice work is a priority, explore our Pilates equipment for vocalists for breath control and projection.
Why Pilates Equipment Builds Stage Presence
Stage presence isn't about charisma; it's about control. When you stand before an audience, every visible tremor, slouch, or hesitation undermines your message. Pilates equipment, by its very design, trains three foundational elements of presence:
Postural Alignment Under Load. Reformers and towers force you to maintain spinal integrity while resisting spring tension. You learn what "standing tall" actually feels like in your body, not as an abstract instruction. When you return to stage, that neural pathway is automatic.
Core Stability and Breath Integration. Pilates demands coordinated breathing with movement. Public speakers often hold their breath or shallow-breathe when nervous. Equipment training conditions deep, steady breathing even under exertion, a skill that calms your nervous system and steadies your voice on stage.
Movement Precision and Spatial Awareness. Whether executing leg springs on a reformer or balancing on a Pilates chair, you develop micro-motor control. This translates to deliberate gesturing, poised transitions across a stage, and the ability to hold a position without fidgeting.
Step 1: Assess Your Space and Define Your Footprint
Before purchasing equipment, measure and map your training area as if choreographing a dance. Stage presence work requires room to move, breathe, and reset quickly between repetitions (just as classes require fast resets between clients).
Start by taping the footprint. Use painter's tape to outline potential equipment placement on your floor: For a room-by-room plan, see our silent small-space studio setup.
- Reformer footprint: Approximately 8 feet long × 2.5 feet wide. Note the space needed at the head and foot for arm/leg extensions (often 2-3 additional feet).
- Pilates Chair (Wunda Chair): Roughly 2 feet × 2 feet, highly compact.
- Ladder Barrel: Approximately 4 feet long × 2 feet wide; requires 1-2 feet of clear space in front for stretching work.
- Pilates Tower or Cadillac: 5-7 feet tall; needs vertical clearance and a perimeter of 18-24 inches for safe entry/exit and arm movement.
Test the flow. Walk around your taped layout. Can you move from one station to another without shuffling? Can you load and exit the reformer without bumping walls or furniture? For stage presence work, you'll often move between equipment stations (reformer for core stability, chair for balance, barrel for spinal extension), so clear pathways matter. I once taped out three reformers on my studio floor, then realized only one left safe walking lanes. That day I started treating floor plans like choreography. Every hinge, caster, and wall stud matters when clients move.
Step 2: Select Core Equipment by Training Goal
Not all Pilates equipment serves stage presence equally. Prioritize based on which postural and presence challenges you face.
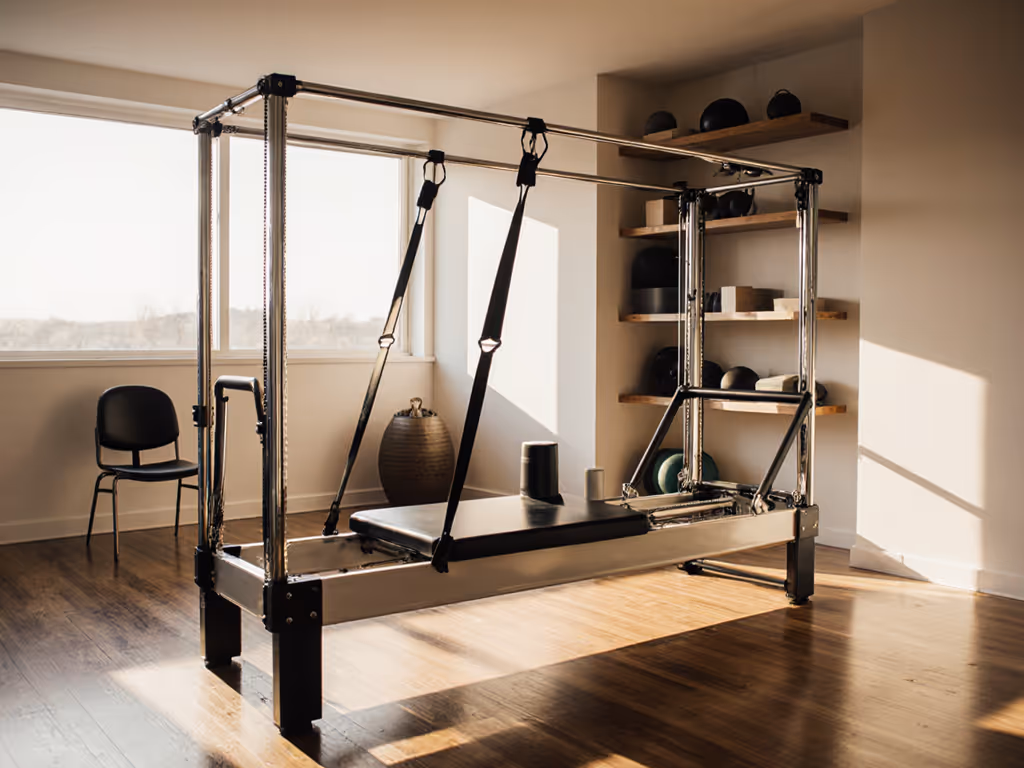
Reformer: The Foundational Workhorse
The Pilates Reformer is non-negotiable for stage presence training[1]. It's the primary tool for building core-driven stability and breath integration under load. Not sure where to start? Compare quiet home reformers tested for compact spaces and low noise.
Why it matters for presenters: The reformer's carriage resistance forces you to maintain spinal alignment while moving through functional ranges. Imagine delivering your opening remarks while standing on an unstable surface; your nervous system would engage every stabilizer muscle. Reformer training makes that stability automatic off-stage.
Key models and their footprints:
-
C8-Pro Reformer ($3,999): Durable and stackable; 8 feet × 2.5 feet. Ideal for studios or larger home spaces. The C8's smooth carriage and quiet operation, critical for apartments and offices, make it reliable for daily presence training without auditory distraction[1].
-
A8-Pro Reformer ($4,999): Adjustable heights and silent operation; approximately 8 feet × 2.5 feet. Premium choice for users of varying heights (tall speakers often struggle with standard equipment) and those prioritizing noise isolation in shared spaces[1].
-
Balanced Body Allegro 2: Commercial-grade, studio-quality build tested for durability over extended use. Studio-grade performance without industrial bulk, ideal for professionals balancing presentation training with limited floor space[6].
-
AeroPilates Reformer 287: Budget-conscious entry point. While less durable than commercial models, acceptable for light to moderate presence training in smaller footprints[6].
Setup Step: Place the reformer with its long axis parallel to a wall or mirror. This allows you to see your postural alignment during training, a critical feedback loop for presence work. Ensure 3-4 feet of clearance at the foot end for leg extensions. Add a non-slip mat beneath (more on floor protection below).
Pilates Chair (Wunda Chair): Precision Balance and Lower-Body Command
The Pilates Chair, also called the Wunda Chair, is compact (2 feet × 2 feet) and exceptionally valuable for stage presence because it demands balance and lower-body control in real-time, exactly the micro-stability you need when standing and speaking[3].
Why it matters: Presenters often lock their knees or sway unconsciously. Chair work forces you to stay engaged in your legs and glutes while maintaining an upright spine. When you return to stage, that active leg engagement prevents nervous swaying.
Key advantages:
- Extremely compact; fits apartments, offices, and micro-studios.
- Challenging enough for advanced practitioners; scalable for beginners via spring adjustments.
- Ideal for lower body, balance, and functional movement training[3].
Setup Step: Place the chair in an open area away from walls. You'll shift weight and lean during exercises; allow 2-3 feet of clear space in all directions. Position it perpendicular to a mirror if possible, so you can monitor hip alignment and posture.
Ladder Barrel: Spinal Extension and Breathing Authority
The Ladder Barrel trains spinal extension, which directly supports the "open chest" posture of confident presenters. It also reinforces breath capacity; your rib cage opens fully as you extend over the barrel[3].
Why it matters for stage presence: Anxiety often manifests as thoracic collapse and shallow breathing. Barrel work trains you to hold an open, expanded posture even under spinal load, building neural pathways that carry over to stressful presentations.
Footprint: Approximately 4 feet long × 2 feet wide; requires 1-2 feet of clear space in front for forward folds and stretches[3].
Setup Step: Position the barrel perpendicular to a wall (to prevent it rolling away) with ample clearance in front. Use a non-slip mat beneath. Ensure overhead clearance if you intend deep backbends (at least 4 feet of vertical space).
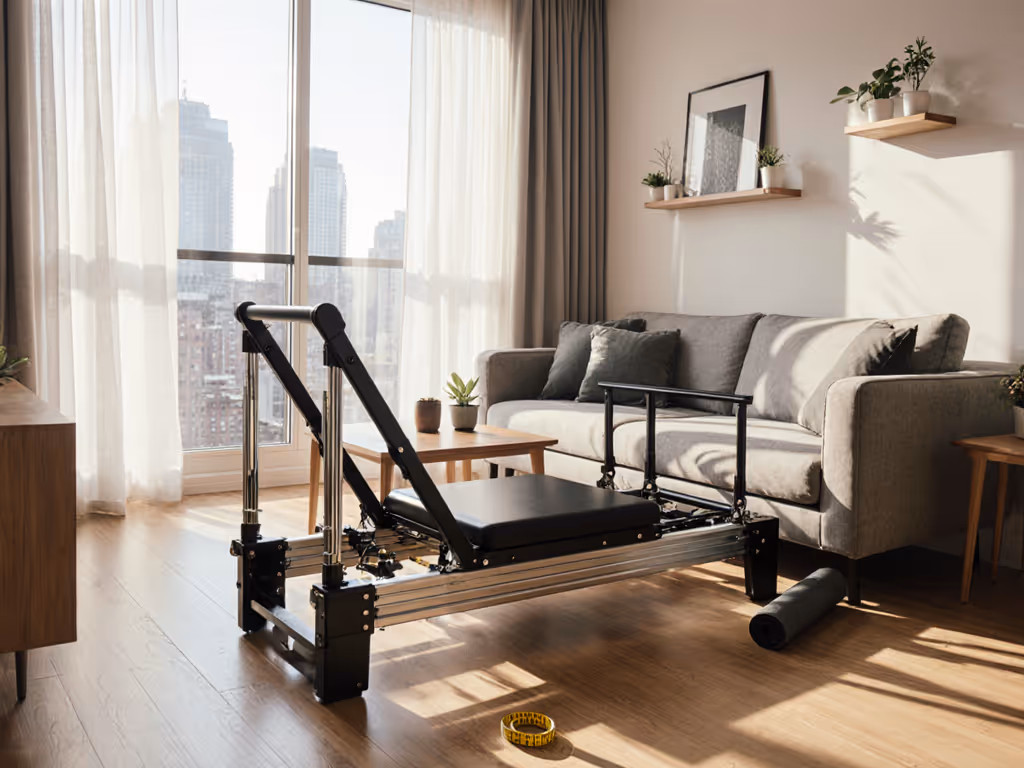
Pilates Tower or Cadillac Trapeze: Vertical Versatility in Compact Form
If your space is truly minimal or you're building a micro-studio, a Pilates Tower (essentially a reformer with a vertical frame and spring-loaded arms) offers unmatched versatility in a relatively compact footprint[3].
Why it matters: Towers allow you to work arms, legs, and spine against spring resistance simultaneously, building integrated, full-body stability. For presenters, this means practicing upper-body openness and arm freedom while your core is engaged, the exact coordination needed when gesturing and speaking.
Footprint: Standard reformer base (8 feet × 2.5 feet) with 5-7 feet of vertical height and 18-24 inches of perimeter clearance for arm movement[3].
Setup Step: Measure ceiling height carefully. Install on level flooring with vibration-dampening pads beneath the base (discussed below). Ensure no overhead obstacles and clear space for side-arm springs and leg springs to move without restriction.
Step 3: Build a Noise and Vibration Isolation Baseline
For apartment dwellers and office-based presenters, equipment noise is non-negotiable. The last thing you need is a squeaking carriage undermining your presence-building confidence.
Decibel and vibration targets for shared spaces:
- Equipment noise baseline: <60 dB (conversational volume). Studio-quality reformers with silent carriages (like the A8-Pro and C8-Pro) typically operate at 50-55 dB[1].
- Floor vibration transmission: <1mm amplitude in shared buildings. Non-slip, high-density rubber mats rated for >0.5-inch thickness provide meaningful isolation[1].
Floor protection checklist:
- Assess your floor type: Hardwood, tile, or concrete? Each transmits vibration differently. For floor-specific noise and stability solutions, use our Pilates flooring fixes. Pre-war wood floors are most vulnerable; concrete is most forgiving.
- Choose a vibration-dampening mat: High-density rubber mats (at least 0.5 inches thick) placed beneath equipment reduce floor vibration transmission. Avoid thin yoga-style mats; they offer zero vibration isolation.
- Add a secondary layer if needed: For creaky wooden floors or overly sensitive neighbors, sandwich the rubber mat beneath a thin plywood platform (3/4 inch), then place the equipment on top. This distributes weight and reduces point-load vibration.
- Test before committing: If possible, borrow a mat and test your heaviest piece of equipment for two days, asking neighbors below if they notice vibration. Real-world testing beats spec sheets.
Noise reduction for spring systems:
- Reformer springs naturally make small sounds during movement. Silent-carriage models (A8-Pro, C8-Pro, Balanced Body Allegro 2) use precision engineering to minimize noise[1][6].
- Inspect springs quarterly. Rust and friction create squeaks; a light silicone spray (not WD-40, which is too heavy) on spring attachments prevents deterioration.
- Use microfiber pads under the carriage bumpers to dampen end-of-motion impact.
Step 4: Create a Modular Training Sequence
Stage presence training isn't one long session; it's a choreographed sequence that builds postural awareness in stages. Here is a simple structure you can repeat.
Warm-Up Phase (5 minutes)
Equipment: Mat, Pilates ball, or stability ball.
Goal: Activate your stabilizers and prime breathing awareness.
- Lie on your back on a mat. Place a Pilates ball (small, 6-8 inches) beneath your upper back. Roll slowly over the ball, extending your spine and opening your chest. Synchronize with deep, slow breaths. This mimics the "open posture" you'll hold on stage[8].
- Perform marching exercises on a stability ball: sit on the ball, maintain an upright spine, and alternate lifting legs. This trains real-time balance, the exact sensation you need to avoid swaying during presentations.
Space needed: 6 feet × 6 feet of clear floor space.
Core-Building Phase (15-20 minutes)
Equipment: Reformer (primary) or Pilates Tower.
Goal: Build deep core stability and breath integration under load.
- Hundreds (legs in straps): 5-10 sets of 10 pulses. The Hundreds is a Pilates staple for recruiting deep abdominals while maintaining breathing rhythm. Your nervous system learns to breathe steadily even under exertion, directly applicable to stressful presentations[1].
- Leg Springs (side-lying leg raises): 8-10 reps per side. The springs' variable resistance trains stabilizer muscles that prevent trunk rotation and sway. Presenters benefit enormously from this lateral stability.
- Footbar work (knee stretches, leg presses): 10-15 reps per variation. This builds quadriceps and core coactivation; strong quads prevent the "locked knees" stance that looks uncertain on stage.
Setup note: Use the reformer's full length. Position yourself on the carriage and ensure the footbar springs are properly adjusted to your height. Tall presenters often need higher footbar settings or longer carriage extensions, another reason adjustable models (A8-Pro, Allegro 2) are worth the investment[1][6].
Upper-Body and Postural Command Phase (10-15 minutes)
Equipment: Ladder Barrel and/or Pilates Tower (if equipped with arm springs).
Goal: Open the chest, strengthen the back extensors, and practice breathing in an extended spinal position.
- Backbends over the barrel: 5-8 reps. Lie perpendicular over the ladder barrel, feet anchored on the floor. Extend backward, feeling your spine lengthen and your chest open fully. Hold for 5 breaths. This position mirrors the "open, confident posture" you want on stage[3].
- Arm springs (if tower-equipped): 8-10 reps of arm circles or presses. Variable spring tension trains shoulder stability and free arm movement. Presenters benefit from rehearsing arm gestures against resistance, it builds smooth, intentional movement patterns[3].
Space needed: 6 feet × 4 feet for barrel and arm movement clearance.
Balance and Presence Phase (10 minutes)
Equipment: Pilates Chair (Wunda Chair).
Goal: Train real-time balance and lower-body command under focused attention.
- Seated series (leg lifts, side reaches): 8-10 reps per direction. The spring-loaded seat demands active engagement; your glutes and core stabilizers fire continuously. This mimics the muscular engagement of standing presence.
- Standing transitions (if advanced): Some exercises require shifting from sitting to standing on the chair itself. This trains the confidence and body awareness needed for poised on-stage movement[3].
Space needed: 4 feet × 4 feet of clear space around the chair.
Cool-Down and Breathing Finalization (5 minutes)
Equipment: Mat, foam roller (optional).
Goal: Lower heart rate, restore diaphragmatic breathing, and anchor the postural learning.
- Lie on your back on the mat. Place a foam roller beneath your mid-back (perpendicular to your spine). Extend your arms overhead and breathe deeply for 3-5 minutes. This lengthens your spine and trains the expanded breathing pattern you'll use while presenting[8].
Total sequence time: 45-65 minutes, depending on intensity.
Step 5: Optimize for Micro-Studios and Multi-User Setups
If you're running a micro-studio or group presence-coaching practice, your footprint and reset workflow are critical.
Layout Template for 400-600 Square Feet
Station layout:
- Station A (Reformer): 8 feet × 2.5 feet, positioned parallel to one wall with 3 feet of clearance at foot end. This is your primary core-building station.
- Station B (Pilates Chair): 2 feet × 2 feet, positioned in an open area 4-5 feet from the reformer. Allows two simultaneous sessions if needed.
- Station C (Ladder Barrel or Tower): 4-5 feet × 2.5 feet, positioned perpendicular to Station A for visual separation.
- Warm-up/cool-down zone: 6 feet × 6 feet of clear mat space for mat work and breathing finalization.
- Clear walkway: Minimum 2.5 feet of unobstructed circulation between all stations. This is non-negotiable for safe transitions and meets basic accessibility standards.
Visual diagram (bird's-eye view):
 Wall
 [Ladder Barrel]
 (4 × 2.5 ft)
 |
 2.5 ft | Clearance
 |
[Reformer] ← → [Pilates Chair]
(8 × 2.5) (2 × 2)
 |
 | 3 ft clearance
 |
[Warm-up/Cool-down Mat Zone]
 (6 × 6 ft)
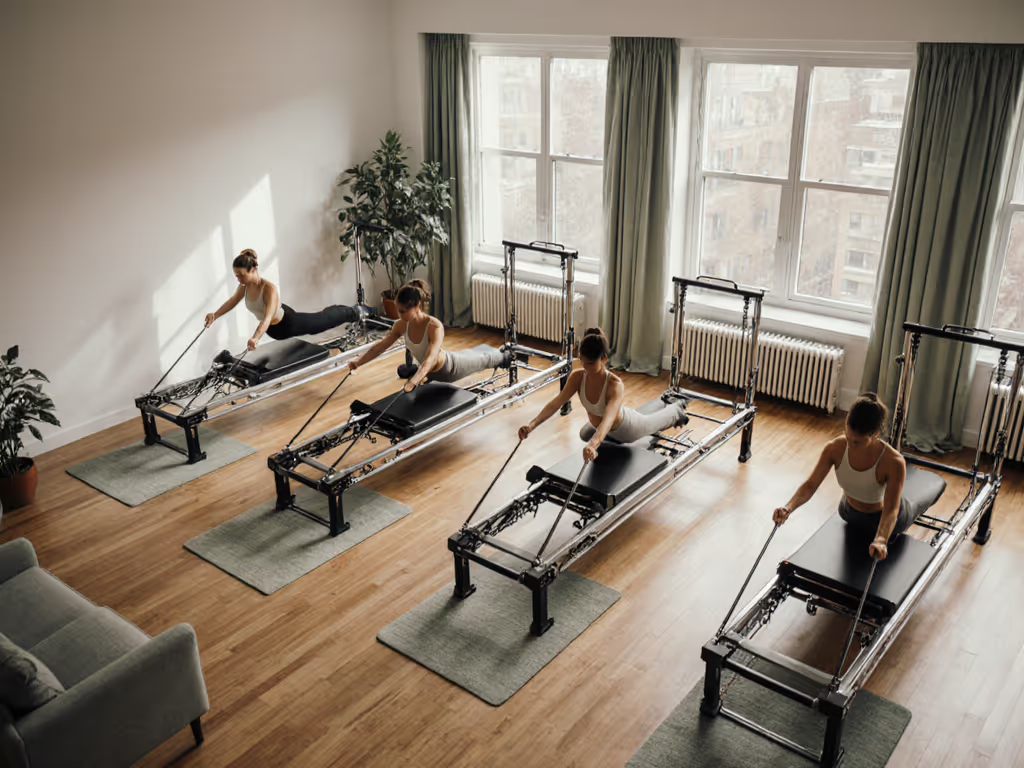
This layout allows one person per station with safe transitions. For group sessions, you can accommodate 3-4 participants rotating through stations on 10-15 minute intervals.
Reset and Reconfiguration Workflow
Between-session reset (2-3 minutes):
- Scan for safety: Check that all springs are engaged, footbars are locked, and straps are neatly coiled. A loose strap or misaligned footbar creates injury risk and presenter anxiety.
- Wipe and re-center: Use a microfiber cloth to wipe down the carriage and chair seat (hygiene + visual reset). Ensure each piece is centered in its designated footprint.
- Adjust for next user: Reset spring tension, footbar height, and armrest positions to neutral (or to the next user's preset if you maintain profiles). This step takes <60 seconds per station[1].
- Check floor mats: Ensure vibration-dampening mats beneath each piece are clean and flat. A wrinkled mat invites equipment creep and vibration transmission.
End-of-day breakdown (5 minutes):
- Stack the Pilates Chair (if it's a stackable model) in a closet or corner.
- Cover the reformer with a fitted sheet or dust cover to prevent dust accumulation and preserve spring condition.
- Roll the ladder barrel against the wall, ensuring it can't roll freely.
- Sweep and clear the mat zone of any debris.
This workflow is repeatable and teachable to studio staff or assistants, critical for scaling a presence-training practice without burnout.
Step 6: Material and Maintenance Considerations
For apartments and shared spaces, low-VOC materials and easy maintenance are non-negotiable.
Equipment Material Standards
Wood and upholstery: Look for reformers with eco-friendly wood frames and water-based, non-toxic upholstery. Off-gassing from cheap foam and adhesives is a real concern in small spaces and around children/pets[1][2].
Springs: Stainless steel or powder-coated springs resist rust and require minimal lubrication. Check that your model uses quality springs rated for 10,000+ cycles (roughly 5-7 years of daily use)[2].
Carriage damping: Silent-operation models use micro-textured nylon or felt pads on the carriage rails. These reduce noise and prevent metal-on-metal friction, which creates squeaks[1].
Maintenance Checklist (Monthly)
- Inspect springs: Look for rust, misalignment, or loose attachments. A silicone spray on spring attachment points (not on rails or carriage) prevents corrosion.
- Check straps and foam: Tears or flattened foam indicate wear. Most reformer brands sell replacement straps and foot pads; keep spares on hand.
- Clean the carriage rails: Dust and lint accumulate in rail grooves. A damp microfiber cloth, run along the rails, removes debris. Never use oil; it attracts dust. For full upkeep protocols that keep noise down and performance smooth, follow our reformer maintenance guide.
- Test footbar locks: Ensure footbar height adjustments lock firmly. A loose footbar creates noise and safety risk.
- Inspect the frame: Tighten any visible bolts. Loose fasteners eventually rattle during use, creating the very squeaks you're trying to avoid.
Step 7: Measuring Success and Refining Your Presence
Presence training via Pilates equipment is measurable. Track these markers over 4-8 weeks:
Postural Metrics
- Spine alignment (self-assessment): Record a 2-minute presentation video each week. Note: Do you maintain cervical (neck) neutrality? Is your thoracic spine extended? Does your lumbar curve look balanced? Reformer and barrel training should visibly improve alignment week-to-week[1][3].
- Breathing pattern: During presentations, count how many times you pause to breathe deeply. Reformer core work should reduce breath-holding and allow steady, confident vocalization.
- Lower-body stability: Ask a colleague if your stance seems more grounded, less swaying. Pilates Chair work specifically targets this[3].
Performance Metrics
- Audience engagement: Do you gesture more freely and intentionally? Do your movements feel deliberate, not nervous? Reformer and tower work builds the arm stability and upper-back strength to support open, confident gestures[3].
- Speaking pace and volume: Do you rush or speak softly? Core stability and diaphragmatic breathing (trained via ladder barrel work) typically result in slower, more authoritative speech[3].
- Recovery time: How quickly do you feel energized after presenting? Core and postural strength reduce presentation fatigue, allowing you to move through multiple talks or meetings without exhaustion.
Actionable Next Step: Start Your Footprint Audit This Week
You don't need a fully equipped studio tomorrow. Start with a single, honest assessment:
- Measure your available space (in feet and inches). Note ceiling height, floor type (wood, tile, concrete), and proximity to adjacent rooms.
- Tape the footprint of a reformer (8 × 2.5 feet) on your floor using painter's tape. Walk around it. Can you move freely? Do you have 3+ feet of clearance at the foot end?
- Identify your primary goal: Are you training for improved posture during Zoom calls? In-person presentations? Public speaking events? This shapes your equipment priority (reformer for core, chair for balance, barrel for breathing).
- Source a trial mat or vibration pad from a local studio, fitness retailer, or rental service. Test your floor's vibration response before purchasing equipment. Ask neighbors if they notice anything.
- Set a timeline: Commit to one piece of equipment (reformer, chair, or barrel) as your starting point. Add secondary pieces only after 4-6 weeks of consistent training, once you understand your space, noise, and maintenance needs.
Presence isn't built overnight. It's built through consistency, precision, and a workspace that supports rather than hinders your practice. With the right equipment, footprint, and workflow, every training session becomes a rehearsal for the confident, grounded presence you'll bring to the stage, and the room itself becomes a mirror of that intention.
Related Articles